Raspbian
First we need to download raspbian, you can grab the latest version at
https://www.raspberrypi.org/downloads/
Direct url:
http://downloads.raspberrypi.org/raspbian_latest
Now we need unzip the file: 2015-05-05-raspbian-wheezy.zip:
unzip 2015-05-05-raspbian-wheezy.zip
You will get a file named
2015-05-05-raspbian-wheezy.img, this file must be written to your micro-sd card.
When the image is written, insert the micro-sd card into your Raspberry Pi, and turn it on.
When the Raspberry Pi is booted, you should see a screen like this, on first startup.
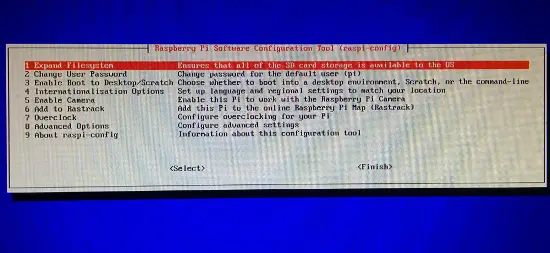
Now I select following options:
1 Expand Filesystem
3 Enable Boot To Desktop/Scratch -> Select Console Text Console, requiring login (default)
8 Advanced Options -> A4 SSH -> Enable
8 Advanced Options -> A0 Update
Finish -> Reboot
Now you can login with following username:
pi and password:
raspberry.
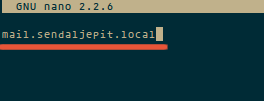
First we setup the network configuration for our server by editing
sudo nano /etc/network/interfaces
My
/etc/network/interfaces file looks like this (change the setup of your needs):
auto lo
iface lo inet loopback

auto eth0
allow-hotplug eth0
iface eth0 inet static
        address 10.255.50.30
        netmask 255.255.255.0
        gateway 10.255.50.1
        dns-nameservers 8.8.8.8 8.8.4.4
Now we restart the network service on the Pi:
sudo /etc/init.d/networking restart
Then we disable DHCP on startup with this command:
sudo update-rc.d -f dhcpcd remove
If you somehow would like to enable it again later, just run following command:
sudo update-rc.d dhcpcd defaults
Now we can use an SSH client such as PuTTY to connect from our PC to the Raspberry Pi.
Now we update raspbian with following command:
sudo apt-get update && apt-get upgrade -y && apt-get dist-upgrade -y
PlaySMS
Download and install playsms 1.1:
sudo -s
apt-get install apache2 libapache2-mod-php5 mysql-server php5 php5-cli php5-mysql php5-mcrypt php5-gd php5-imap php5-curl
php5enmod mcrypt
service apache2 restart
When asked for the new password for the MySQL "root" user, use a strong password, in this example I have used
MyP@$$w0rd
Now we can go to
http://your-ip, in my case http://10.255.50.30 ,and we will see a page showing: "
It Works!".
cd /tmp/
wget http://downloads.sourceforge.net/project/playsms/playsms/Version%201.1/playsms-1.1.tar.gz
tar -zxf playsms-1.1.tar.gz -C /usr/local/src
ls -l /usr/local/src/
cd /usr/local/src/playsms-1.1/
cp install.conf.dist install.conf
nano install.conf
Copy install.conf.dist to install.conf and edit install.conf
Read install.conf and make changes to suit your system configuration.
I've edited the file, so it looks like this:
# INSTALL DATA
# ============


# Please change INSTALL DATA below to suit your system configurations

# Please do not change variable name, you may change only the value

# MySQL database username
DBUSER="root"

# MySQL database password
DBPASS="MyP@$$w0rd"

# MySQL database name
DBNAME="playsms"

# MySQL database host
DBHOST="localhost"

# MySQL database port
DBPORT="3306"

# Web server's user, for example apache2 user by default is www-data
# note: please make sure your web server user
WEBSERVERUSER="www-data"

# Web server's group, for example apache2 group by default is www-data
# note: please make sure your web server group
WEBSERVERGROUP="www-data"

# Path to playSMS extracted source files
PATHSRC="$(pwd)"

# Path to playSMS web files
# note: please make sure your web root path, in this example its /var/www/html
PATHWEB="/var/www/html/playsms"

# Path to playSMS additional files
PATHLIB="/var/lib/playsms"

# Path to playSMS daemon and other binary files
PATHBIN="/usr/local/bin"

# Path to playSMS log files
PATHLOG="/var/log/playsms"


# END OF INSTALL DATA
# ===================
Now Run:
./install-playsms.sh
Press Y if everything looks OK.
Now we want to make sure playsms starts on boot by adding a line into rc.local file.
nano /etc/init.d/rc.local
Add following to the file:
/usr/local/bin/playsmsd start on the bottom of the file (before exit if there's an exit command).
This way playsmsd will start automatically on boot.
..
/usr/local/bin/playsmsd start
Edit the apache vhost file:
nano /etc/apache2/sites-available/default
My vhost file looks like this:
 ServerAdmin webmaster@localhost

        DocumentRoot /var/www/html/playsms

                Options FollowSymLinks
                AllowOverride None


                Options Indexes FollowSymLinks MultiViews
                AllowOverride None
                Order allow,deny
                allow from all


        ScriptAlias /cgi-bin/ /usr/lib/cgi-bin/
        <directory "="" usr="" lib="" cgi-bin"="">
                AllowOverride None
                Options +ExecCGI -MultiViews +SymLinksIfOwnerMatch
                Order allow,deny
                Allow from all


        ErrorLog ${APACHE_LOG_DIR}/error.log

        # Possible values include: debug, info, notice, warn, error, crit,
        # alert, emerg.
        LogLevel warn

        CustomLog ${APACHE_LOG_DIR}/access.log combined
Now reload the Aapache2 configuration to apply the changes.
service apache2 reload
Then you should be able to access the playsms website at following url:
Go to http://your-ip etc. http://10.255.50.30
You can login with:
username: admin
password: admin
First we install build tools to build the latest version. Run:
apt-get install build-essential libusb-1.0 libusb-1.0-0-dev
Now I have plugged in the Huawei E3131 modem, and I can see it listed with
lsusb:
lsusb
lsusb
Bus 001 Device 002: ID 0424:9514 Standard Microsystems Corp.
Bus 001 Device 001: ID 1d6b:0002 Linux Foundation 2.0 root hub
Bus 001 Device 003: ID 0424:ec00 Standard Microsystems Corp.
Bus 001 Device 004: ID 12d1:14fe Huawei Technologies Co., Ltd.
We would like it to be with ID: 12d1:1506, but it's detected with 12d1:14fe right now.
To change this, we install usb_modeswitch to the system, you can grab the latest version from here:
http://www.draisberghof.de/usb_modeswitch/#download
cd /tmp
wget http://www.draisberghof.de/usb_modeswitch/usb-modeswitch-2.2.5.tar.bz2
tar jxvf usb-modeswitch-2.2.5.tar.bz2
cd usb-modeswitch-2.2.5
make install
cd /tmp
wget http://www.draisberghof.de/usb_modeswitch/usb-modeswitch-data-20150627.tar.bz2
tar xjvf usb-modeswitch-data-20150627.tar.bz2
cd usb-modeswitch-data-20150627
make install
Now unplug the modem, and plug it in again, then run:
lsusb
 lsusb
Bus 001 Device 002: ID 0424:9514 Standard Microsystems Corp.
Bus 001 Device 001: ID 1d6b:0002 Linux Foundation 2.0 root hub
Bus 001 Device 003: ID 0424:ec00 Standard Microsystems Corp.
Bus 001 Device 006: ID 12d1:1506 Huawei Technologies Co., Ltd. E398 LTE/UMTS/GSM Modem/Networkcard
Now we got the desired mode: 12d1:1506.
Next we proceed with SMS Server Tools 3.
First we download it, then unpack it and install it.
cd /usr/local/src
wget http://smstools3.kekekasvi.com/packages/smstools3-3.1.15.tar.gz
tar -zxvf smstools3-3.1.15.tar.gz
cd smstools3
make
If you see an error like in my case, when you run make:
make
cd src && make -
make[1]: Entering directory '/usr/local/src/smstools3/src'
Makefile:51: *** recipe commences before first target.  Stop.
make[1]: Leaving directory '/usr/local/src/smstools3/src'
Makefile:10: recipe for target 'compile' failed
make: *** [compile] Error 2
Then do following:
nano src/Makefile
The problem is a missing tab, now look for:
ifeq (,$(findstring DISABLE_INET_SOCKET,$(CFLAGS)))
override LFLAGS += -lsocket -lnsl
endif
And move the line
override LFLAGS += -lsocket -lnsl with a TAB
ifeq (,$(findstring DISABLE_INET_SOCKET,$(CFLAGS)))
        override LFLAGS += -lsocket -lnsl
endif
And try to run make again:
make
make install
Now we create some required folders:
mkdir -p /var/log/sms/stats
mkdir -p /var/spool/sms/{checked,failed,incoming,outgoing,sent}
mkdir /var/spool/sms/modem1
chown www-data:www-data -R /var/spool/sms
chmod 777 -R /var/spool/sms
And then move the original configuration file and download a sample from PlaySMS:
mv /etc/smsd.conf /etc/smsd.conf.dist
cd /tmp
wget -c https://raw.githubusercontent.com/antonraharja/playSMS/master/contrib/smstools/smsd.conf
cp smsd.conf /etc/
To make sure I always will use the correct device, I will use a dynamic device file.
Read more about dynamic device files at following URL:
http://antonraharja.com/2015/05/14/persistent-paths-for-dynamic-device-file/
nano /etc/udev/rules.d/80-ttyusb-map.rules
ACTION=="add", KERNEL=="ttyUSB[0-9]*", PROGRAM="/etc/udev/rules.d/ttyusb-map.sh %p", SYMLINK+="gsm%c"
touch /etc/udev/rules.d/ttyusb-map.sh
chmod 755 /etc/udev/rules.d/ttyusb-map.sh
nano /etc/udev/rules.d/ttyusb-map.sh
#!/usr/bin/perl -w

@items = split("/", $ARGV[0]);
for ($i = 0; $i < @items; $i++) {
    if ($items[$i] =~ m/^usb[0-9]+$/) {
        print $items[$i + 1] . "\n";
        last;
    }
}
Now unplug, and replug your modem, and it should be located at
/dev/gsm*:
ls -l /dev/gsm*
lrwxrwxrwx 1 root root 7 Jul 24 01:39 /dev/gsm1-1 -> ttyUSB0
lrwxrwxrwx 1 root root 7 Jul 24 01:39 /dev/gsmmodem -> ttyUSB0
I made some changes to the file, so here is my config, my modem is located at
/dev/gsm1-1 replace that with your location.
# Global configuration

#devices = modem1, modem2
devices = modem1

loglevel = 5

# logfiles
stats = /var/log/sms/stats
logfile = /var/log/sms/smsd.log

# Default queue directory = /var/spool/sms
outgoing = /var/spool/sms/outgoing
checked = /var/spool/sms/checked
failed = /var/spool/sms/failed
incoming = /var/spool/sms/incoming
sent = /var/spool/sms/sent

# do not set report folder, let status report files saved in incoming
#report = /var/spool/sms/report

delaytime = 2
errorsleeptime = 10
blocktime = 180
autosplit = 3
#receive_before_send = yes
incoming_utf8 = yes

# Queue configurations

[queues]
modem1 = /var/spool/sms/modem1
#modem2 = /var/spool/sms/modem2

# Modem configurations

# Modem name: modem1
# Modem type: Wavecom USB
[modem1]
#init = AT+CNMI=2,2,0,1,0;+CMEE=1
#init = AT+CPMS="ME","ME","ME"
device = /dev/gsm1-1
baudrate = 19200
incoming = yes
pin = 3391
report = yes
queues = modem1
decode_unicode_text = yes
cs_convert = yes

# Modem name: modem2
# Modem type: Wavecom USB
#[modem2]
#init = AT+CNMI=2,2,0,1,0;+CMEE=1
#device = /dev/ttyUSB1
#baudrate = 115200
#incoming = yes
#report = yes
#queues = modem2
Restart the SMS Server Tools 3:
/etc/init.d/sms3 restart
Verify if SMS Server Tools 3 is running:
ps ax | grep -v grep | grep smsd
Monitor SMS Server Tools 3 log file:
tail -f /var/log/smsd.log
Login to your playsms installation my address is
http://10.255.50.30/
Username is admin
Password is admin
Now go to
Settings =>
Manage gateway and SMSC.
You should see a screen like this:
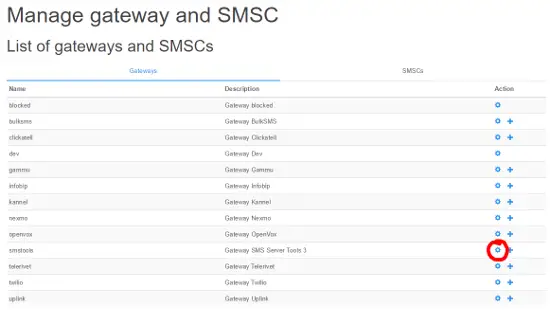
Now click to edit the smstools gateway.
And ensure it's setup like this:
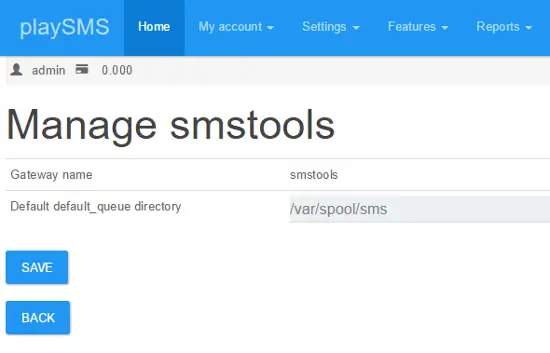
Click Save, and when it's saved click back.
Now you have to setup the SMSC, so please select the + sign at SMSTools.
You should fill in the SMSC Details like this, in receiver number write your modem phone number.
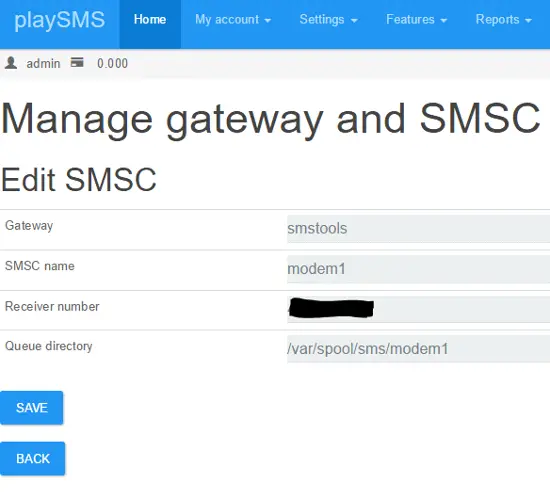
When you are done click save.
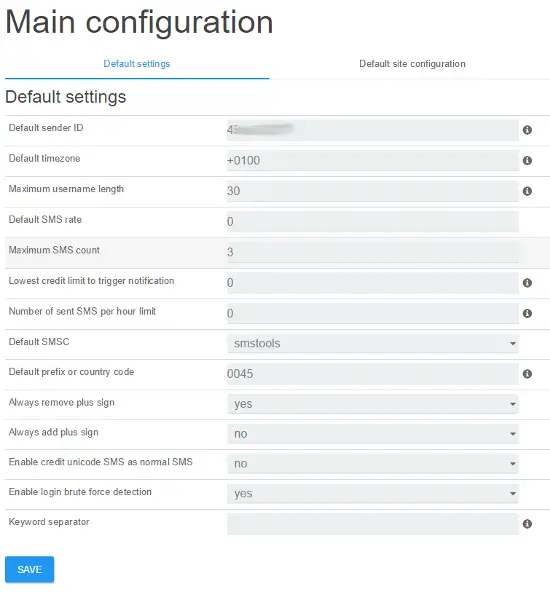
Now go to
Settings =>
Main configuration
And fill following fields:
Default sender ID
Default prefix or country code
And set
Default SMSC to
smstools, like shown on the image below.
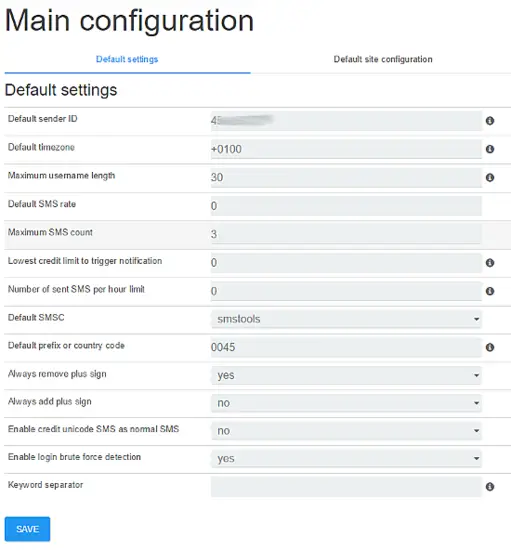
Click save, we are ready to send first SMS.
Send an SMS
Now go to
My account =>
Compose message
Write your cell phone number in Send To, and a message etc. Hello World! in message field, and click send.
If the message get's queued, you can follow transaction here:
Go to
Reports =>
All sent messages
Incoming messages that are unhandled is kept in sandbox, you will this in
Reports =>
Sandbox
And log if something doesn't is located in
Reports =>
View log If you have any trouble with your setup, a good place seek some help is playsms forum.


Install Zimbra 8.6 on Ubuntu 14.04 Server